Introduction
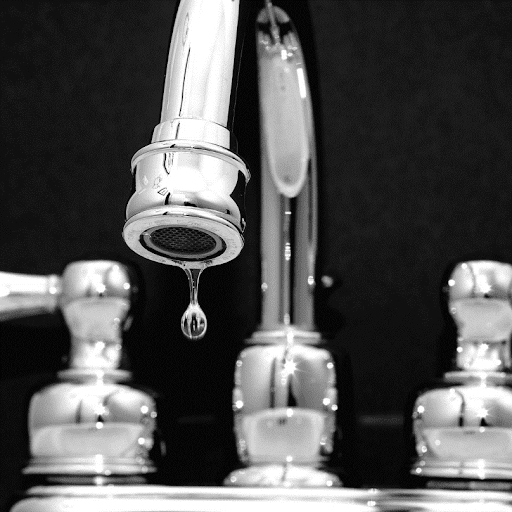
A dripping faucet can be frustrating and environmentally wasteful, resulting in elevated water expenses and potential structural harm if neglected. The positive aspect is that resolving this common plumbing issue is feasible, often demanding only essential tools and a modest level of know-how. In the following comprehensive guide, we will provide you with a systematic approach to rectifying the issue of a leaky faucet, empowering you to address this plumbing concern with confidence. Whether you’re an avid DIY enthusiast or simply aiming to reduce expenses on plumbing repairs, this guide has you covered.
Step 1: Gather Your Tools
Before you begin, gathering all the necessary tools and materials for the task is essential. You’ll need:

- An adjustable wrench
- Screwdriver
- Replacement parts may include a new washer, O-rings, or a faucet repair kit.
- Plumber’s tape: Commonly referred to as Teflon tape, this material creates secure seals for threaded connections.
Step 2: Turn Off the Water Supply
To prevent a plumbing emergency, finding the shut-off valves beneath the sink and closing the hot and cold water sources is crucial. In cases where individual shut-off valves are absent, you may find it necessary to temporarily disable the primary water supply to your residence.
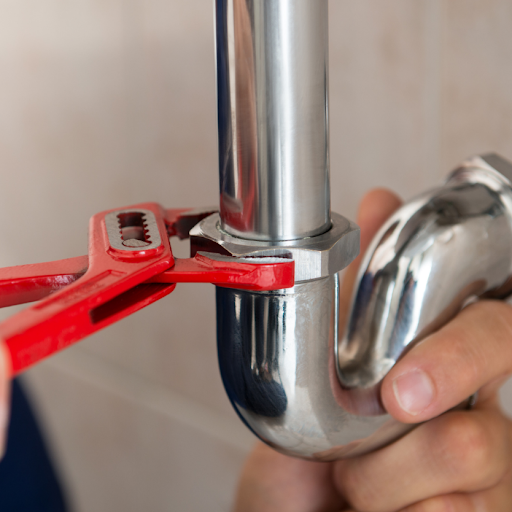
Step 3: Disassemble the Faucet.
Start by removing the faucet handle. This is typically done by prying off the decorative cap on top of the handle to reveal a screw. Utilize a screwdriver to extract the screw and detach the handle. Once you remove the handle, you will uncover the visible faucet stem. Employ a wrench to loosen it and subsequently remove it.
Step 4: Inspect and Replace Components
Now that you have access to the faucet’s internals, it’s time to inspect and replace any worn or damaged parts. Common components to check and replace include:
- Washer: A worn-out washer is a frequent cause of faucet leaks. Substitute the old washer with a new one, ensuring it matches your specific faucet’s appropriate size and type.
- O-rings: These are often found around the stem. Examine them for signs of deterioration, and if needed, replace them.
- Valve seats: If the valve seats are corrupted, they can cause leaks. You may need a valve seat wrench to remove and replace them.
Step 5: Reassemble the Faucet.
After replacing essential components, meticulously reassemble the faucet in the reverse disassembly. Ensure that all connections are tightened securely, but exercise caution to avoid excessive tightening, which could potentially result in damage.
Step 6: Turn the Water Back On.
Having successfully reassembled the faucet, it’s now
appropriate to reinstate the water supply. Gradually rotate the shut-off valves to permit the gradual return of water flow into the faucet. Pause briefly to check for leaks near the faucet and handle connections. If any observed leaks occur, you might need to retighten or reseal these connections accordingly.
Step 7: Test Your Repair
Switch on the faucet and examine it for any lingering leaks. If you’ve followed the steps correctly and replaced the necessary components, your leaky faucet should now be fixed.
Step 8: Preventative Measures
To ensure your faucet stays leak-free in the future, consider implementing these preventative measures:
- Regular Maintenance: Schedule periodic checks of your faucets for early signs of wear and tear. Timely attention to problems is essential to forestall their progression into more substantial and complicated issues.
- Use Plumber’s Tape: When reassembling the faucet, apply the plumber’s tape to the threaded connections. This will help create a tight seal, reducing the risk of leaks.
- Be Gentle: Avoid turning the handles excessively when using your faucet. Over time, this can damage the internal components and lead to leaks.
Step 9: Know When to Seek Professional Help.
While fixing a leaky faucet is a manageable DIY task, some situations may require the expertise of a professional plumber. Consider calling in a licensed plumber if:
- You’re Unsure: If you’re unsure about any step of the repair process or the type of faucet you’re dealing with, it’s better to seek professional guidance to avoid causing further damage.
- The Leak Persists: If the Leak continues even after attempting a repair, it may indicate a more complex issue within the faucet or plumbing system that requires expert attention.
- Your Plumbing Is Old: In older homes with aging systems, leaks can indicate broader plumbing problems. An experienced plumber has the expertise to perform a comprehensive assessment, identifying and resolving any underlying problems.
Step 10: Regularly Check Other Fixtures
Once you’ve successfully fixed your leaky faucet, take the opportunity to inspect and maintain other plumbing fixtures in your home. Check for clogged drains, leak, drips, or unusual noises in sinks, toilets, and showers. Timely attention to minor concerns can thwart their progression into more significant problems.


